
The material presented in this tutorial is based primarily on the material given in the 'Tutorial Manual' of the SYBYL software package.

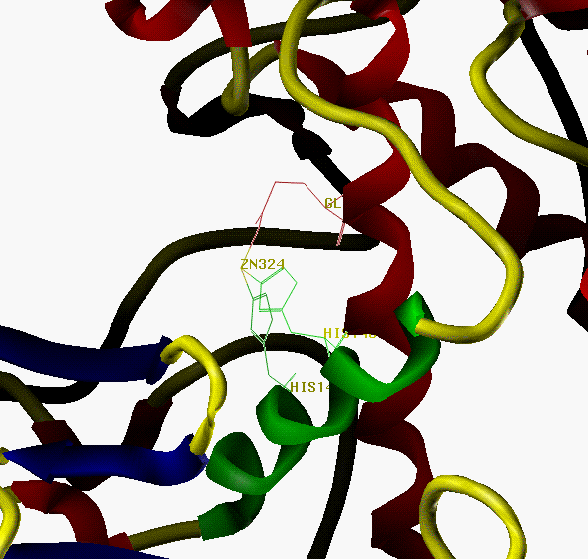
Fig.12 Active site of thermolysin,
showing Zn, HIS142, HIS146 and GLU166.
Helix H4 is colored green,
Other helices red, sheets blue, others yellow.
After this tutorial you will be able to:
BUILD/EDIT >>> ZAP (DELETE) MOLECULE
Use the RESET gadget to reset EVERYTHING
VIEW >>> DELETE ALL BACKGROUNDS
BIOPOLYMER >>> MONOMER DICTIONARY >>> OPEN...
BIOPOLYMER >>> MONOMER DICTIONARY >>> LIST...
A large amount of information is written to the text window. Pay
particular attention to the conformational angle and state definition.
They enable powerful operations in constructing, modifying and analysing
biopolymers.
BIOPOLYMER >>> BUILD >>> PROTEIN...
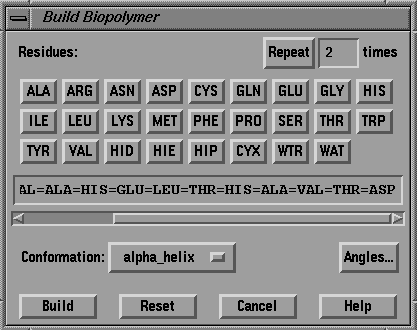
Fig. 13 The Build Polymer menu.
VIEW >>> LABEL >>> SUBSTRUCTURE...
Each Calpha is labeled with the residue type and sequence number.
BUILD >>> MODIFY >>> Molecule...
VIEW >>> COLOR >>> BY ATOM TYPE
BIOPOLYMER >>> ADD HYDROGENS...
FILE >>> SAVE AS...
Fig. 14 Relative orientation of
His142 and His146
Undisplay part of the molecule to facilitate atom selection by
VIEW >>> LABEL >>> ATOM ID...
VIEW >>> MONITOR >>> DISTANCE...
The distance between these atoms (6.87 Angstrom) will be displayed in yellow.
Activate the Rotatable Bonds gadget which initially looks like
fig. 15 (left side).
Fig. 15 Left side: Initial Rotatable bonds menu,
Click on the 'dials' in Rotatable Bonds menu and watch the molecule
changing, while the monitored distance between the histidine
'Nepsilon' atoms previously defined is updated also.
In order to make the rotations permanently, the screen coordinates
have to be transfered to the memory coordinates.
VIEW >>> FREEZE VIEW >>> BOTH...
Use the FILE >>> SAVE AS... to write this model to a file.
Type in the text window (or use the equivalent from the menus)
Type in the text window (or use the equivalent from the menus)
Use ANALYZE >>> FIT ATOMS... to bring up the dialog box.
This concludes the 'basic' peptide building tutorial.
Other SYBYL tutorials:
Return to the
main SYBYL tutorial page.
Clearing work areas
If there is more than one molecule on the screen, click ALL, then
OK to wipe them all.
Use the DISPLAY OPTIONS to reset to FULL screen mode.
The BIOPOLYMER module
The BIOPOLYMER menu contains all the tools to build, edit, and
analyze biopolymers.
Select PROTEIN from the dictionary list (press OK).
Select BRIEF for the listing mode (press OK).Building a peptide
Click on ILE ASP VAL VAL ALA HIS GLU LEU THR HIS ALA VAL THR ASP
Set the conformation option to ALPHA_HELIX.
Press BUILD.
Press ALL in the Substructure Expression dialog box and
press OK.
Select ALL from the Sequence Expression dialog box and press
OK.
Enter 137 in the next dialog box and press OK.
Select NAME (press OK).
Select M1:<no name> (press OK).
Type HELIX4 for the molecule name and press OK.
Select ALL, press OK,
Select ALL and press OK again to add all instead of the
essential_only H atoms.
Type helix4.mol2 in the file selector box, and press
SAVE.Modifying the conformations of the HIS142 and HIS146 sidechains
By rotating and scaling the molecule you will notice that both histidine
monomers are located at the same side of the helix. The sidechains are
oriented very similarly, but since these histidines stablize a Zn atom
in the active side of thermolysin, their relative orientation should be
modifyied to resemblem the orientation as illustrated in fig. 12 and
schematically depicted in fig. 14.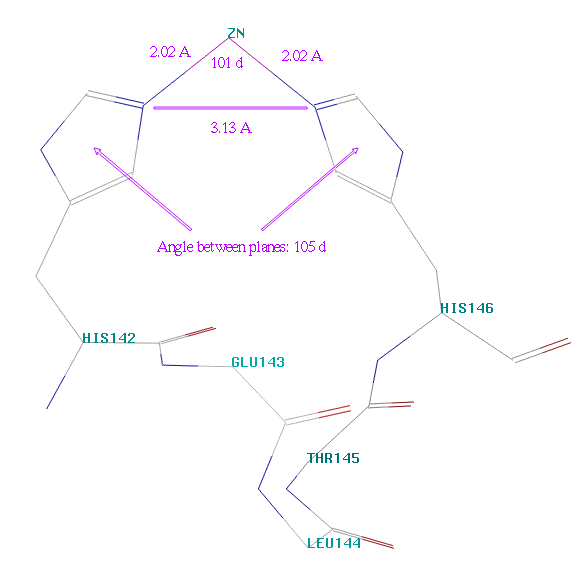
to enable the stabilization of a Zn
in the active site of thermolysin.
VIEW >>> UNDISPLAY ATOMS...
Change the Atoms: box into Monomers: and pick any atom in
residues 137 ... 141 and 147 ... 150
Then, change the Monomers: box back to Atoms:, activate
ATOM TYPES... and toggle the H box on. Click on OK
in both the atom type select box as well as in the general
atom selector menu (only residues 142 through 146 should be visible).
Change the Atoms: box into Monomers: and pick any atom in
residue His142 and His146.
Select ADD and press OK.
Select atoms N47 and N81 and press END.
Click on the empty box just below the 'Q' in the Rotatable Bonds menu
and then pick atoms 33 and 40. The
value of a torsion around this bond will be given on the right side of
the 'dials' in the same menu.
Click on the next empty box (below the '1') and click on atoms 40
and 43.
Continue defining rotatable bonds using atoms 65 and 74,
and then using atoms 74 and 77, so that the Rotatable Bonds menu
looks like the one in fig. 15 (right side).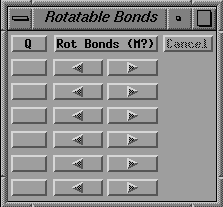
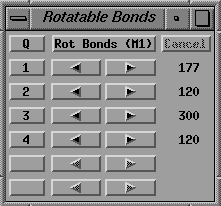
Right side: After specifying the four bonds in the histidine side
chains.
Try to rotate the four bonds in such,
so that the monitored distance is close to 3.13 Angstroms and the angle between
the rings is approximately 105 degrees (which cannot be monitored).
(The values of the torsions in the Rotatable Bonds menu should be close
to 84, 275, 271 and 135 respectively.)
Select ALL and press OK.
use helix4A.mol2 as file name and press SAVE
Compare the new model with a crystallographically determined
thermolysine HELIX4
mol2 in m2 ta_demo:thermolysin4A.mol2 and press Enter
display m1(*-<h>) and press Enter,
label subst m1(*) and press Enter,
label subst m2(*) and press Enter.
Select Add... and pick all Calpha atoms pairwise, starting
with either model.
Select END when done, and SOLVE the least squares
problem.
Click on DONE and RESET >>> EVERYTHING as in the previous
examples.